
Before you start
- Wix Bookings with at least one service: appointments, classes or multi-session courses
- A published site. The kiosk runs on a page of your own site, so the site has to be live
- A front-desk tablet with a web browser. So far the kiosk has been tested in Safari in Apple's iPad simulator
- Wix Intake Forms, only if you want the kiosk to check waivers
The free ways to check clients in on Wix Bookings
Wix gives you two ways to mark attendance yourself, and a free app that lets members check themselves in. If you're prepaid-only with no waiver, they may be all you need.
Mark attendance by hand in the Booking Calendar
In the Booking Calendar, click the class, then click Manage next to the participants. Set each client's Attendance to Booked, Checked-In or No-Show. This is free and always available. A booking stays Booked until a person marks it, so someone has to do this for every arrival. Wix's guide to marking attendance.
Mark it on the go in the Wix app
You can mark the same attendance in the Wix app. That helps when you're away from the desk, for example taking attendance in the studio before class starts. It's free, and it's still done by hand. Wix's guide to attendance in the Wix app.
Use Wix's free Client Check-In app
Client Check-In is a free app from Wix. It shows a session list on a tablet, and members tap their name to check in. Its settings include a check-in window, how names are displayed, search by name or email, and an optional password. If your clients prepay and you have no waiver to check, it's the sensible choice. Wix's guide to setting up Client Check-In.
Where the free tools stop
Wix's help center describes a waiver's validity status as an indicator for you: unless you require the waiver at booking, a client whose form isn't valid can still book a session. Its advice to merchants is to "always manually check submissions before serving clients" (Wix's guide to waivers with Intake Forms). Client Check-In's setup guide lists no waiver or payment check. Checking either at the door falls to a person.
Set up a self check-in kiosk that checks first
Better Check-In is a paid Wix App Market app that turns a tablet into a kiosk. It checks the booking, your check-in window and, if you turn them on, the waiver and payment. Setup is seven steps.
Install Better Check-In from the Wix App Market
Open Better Check-In on the Wix App Market, click Add to Site, and choose the site where you take bookings. It needs Wix Bookings with at least one service, and it works with appointments, classes and multi-session courses.
Better Check-In on the Wix App MarketInstall on Wix14-day free trial on eligible sites. Billed by Wix.
After installing, open Better Check-In from your site's dashboard. The Setup card lists what's left to do, and each row turns to Ready as you finish it.
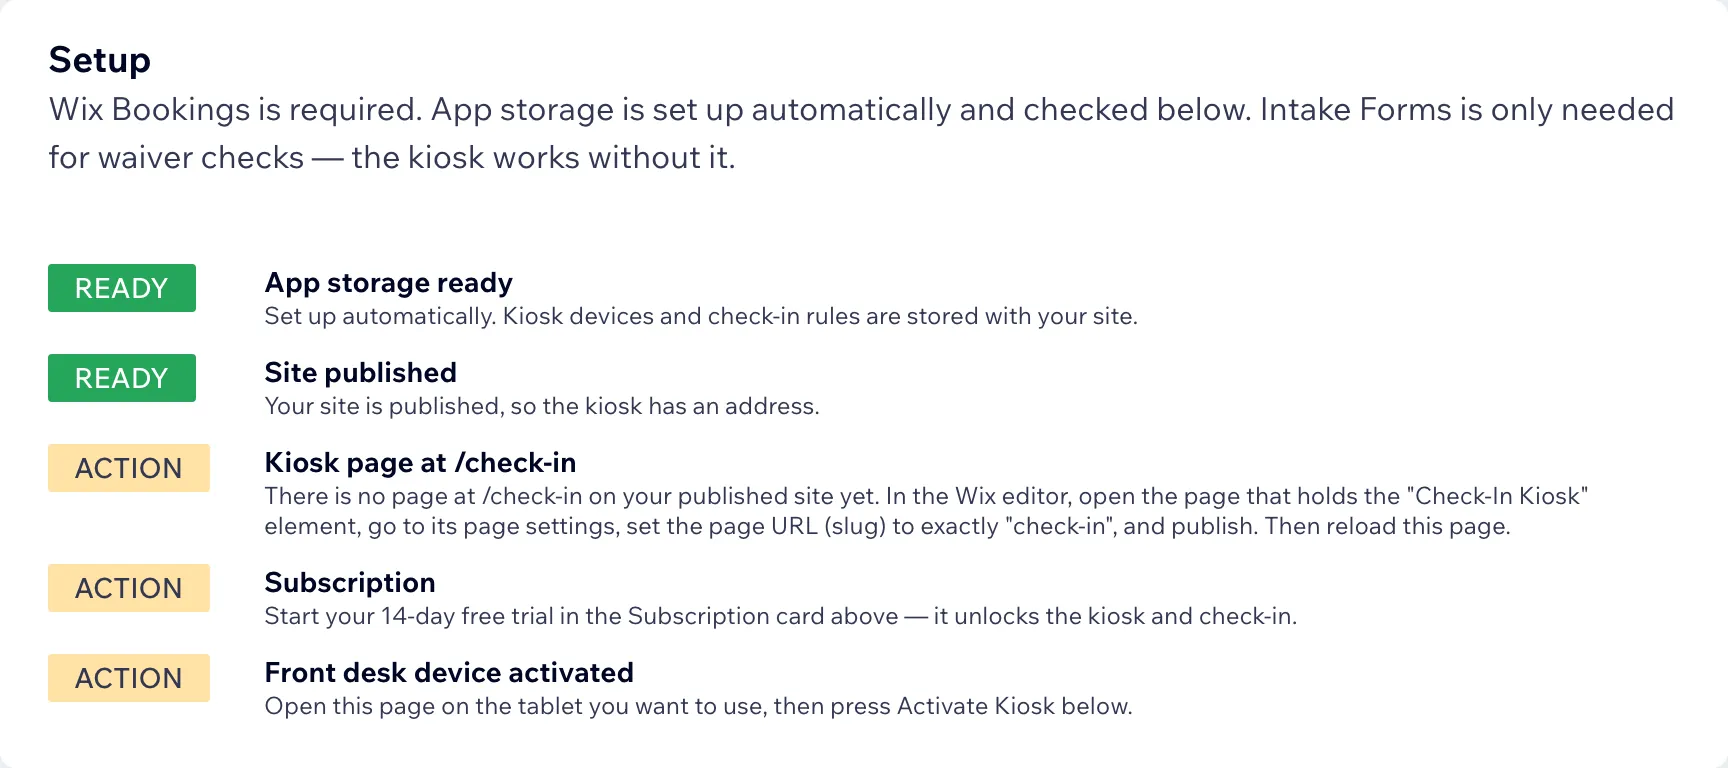
The Setup card partway through: three rows still need action. Create the kiosk page
In the Wix Editor, add a new page. In the page's settings, set its URL (slug) to exactly
check-in. The kiosk will live at/check-inon your own site.Watch the slugWix names a new page after its title, so a page called "Check-In Kiosk" gets the slug
check-in-kiosk, and activation won't find it.Add the Check-In Kiosk element
Open Add Elements → App widgets (or your installed apps) and add the Check-In Kiosk element to that page. Stretch it to full width.
If you reinstall laterIf you ever remove and reinstall the app, Wix removes this element from the page. Add it again after reinstalling.
Hide the page from your menu and publish
In Pages & Menu, open the page's ⋯ menu and choose Hide from menu. The page still works at
/check-in, but visitors won't see it in your navigation. Then publish your site. In the Better Check-In dashboard, the Setup card should show Kiosk page at /check-in as Ready.Setup card not Ready?Check that the slug is exactly
check-inand that you published after adding the element.Start your free trial or Premium
Start your free trial, or upgrade to Premium, from the Subscription card in the dashboard. Premium costs $14.99/month billed monthly, or $12.49/month billed yearly, and Wix bills you through the App Market. The 14-day free trial is available once per site, on eligible sites.
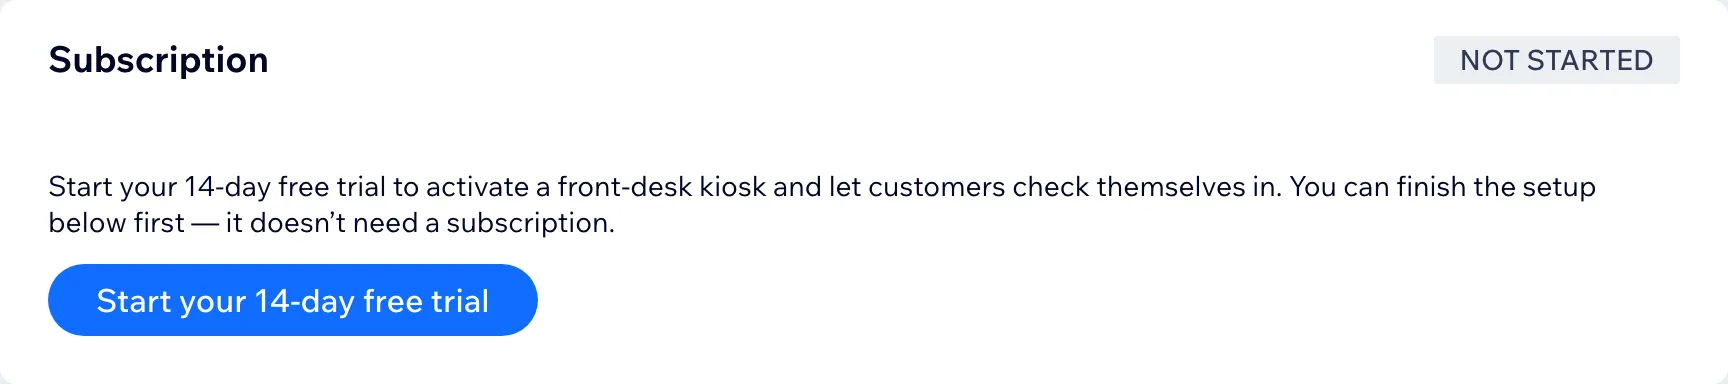
The Subscription card before the trial starts. Good to knowWithout an active Premium subscription, an activated kiosk shows "Self check-in is paused. Please see staff."
Activate the front-desk tablet
On the tablet you'll use at the front desk, open the Better Check-In dashboard and press Activate Kiosk. Then tap Open kiosk on this device. The kiosk stays signed in on that tablet until you revoke it. To revoke a tablet, press Revoke Device in the dashboard.
Do it on the tabletThe activation link works once and expires in 15 minutes, so open it on the tablet straight away.
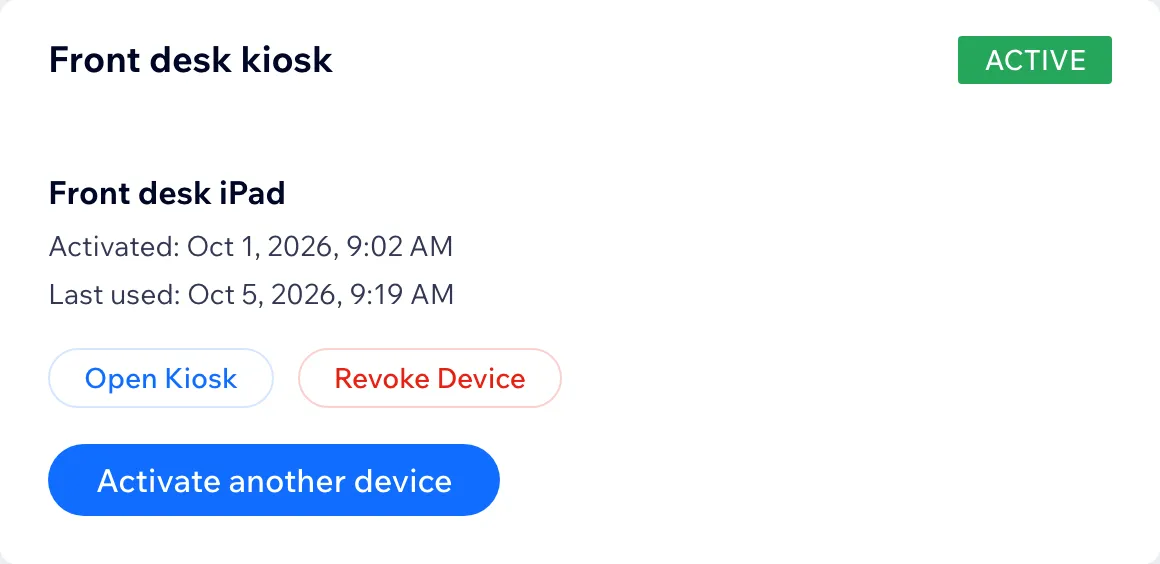
An activated tablet, listed in the dashboard. 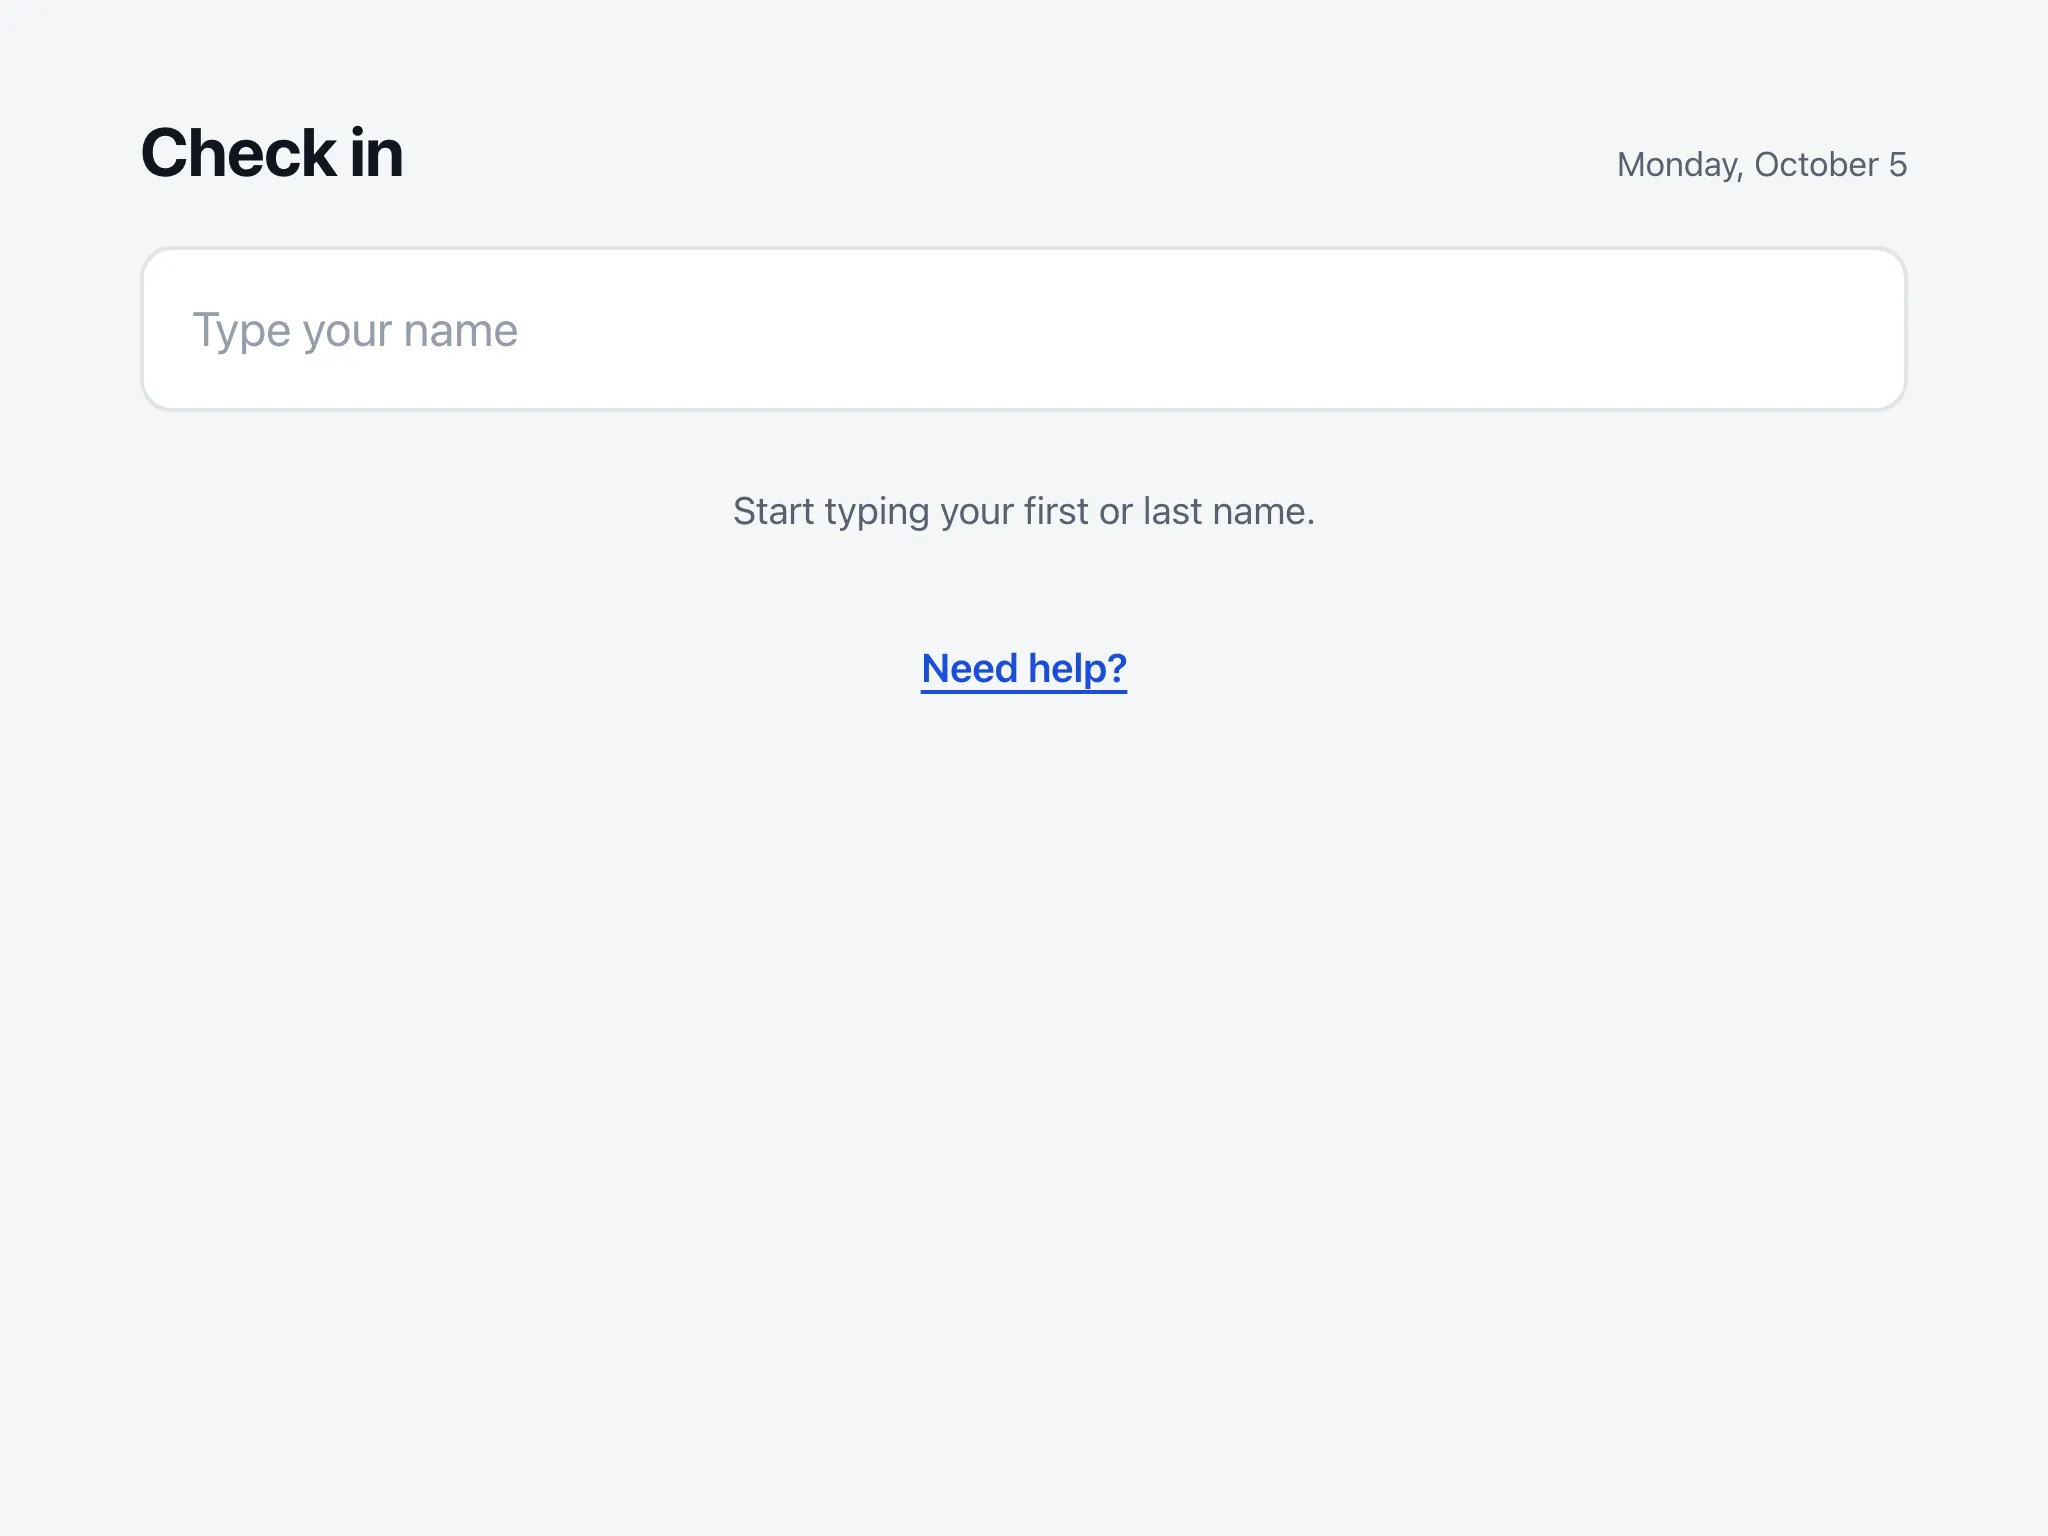
What the activated tablet shows. Set your check-in rules
Choose how early and how late clients may check in. Three more rules are optional:
- Require waiver. The client needs a completed intake form that is still valid when their booking starts.
- Require payment or plan redemption. Wix must record the booking as paid, free, or redeemed with a pricing plan or package.
- Confirm it's them. The client enters the last 4 digits of the phone number on their booking.
What happens when a rule isn't metAnyone who doesn't meet a rule is asked to see staff, and your dashboard shows the reason. Leave Require payment off if you take payment at check-in.
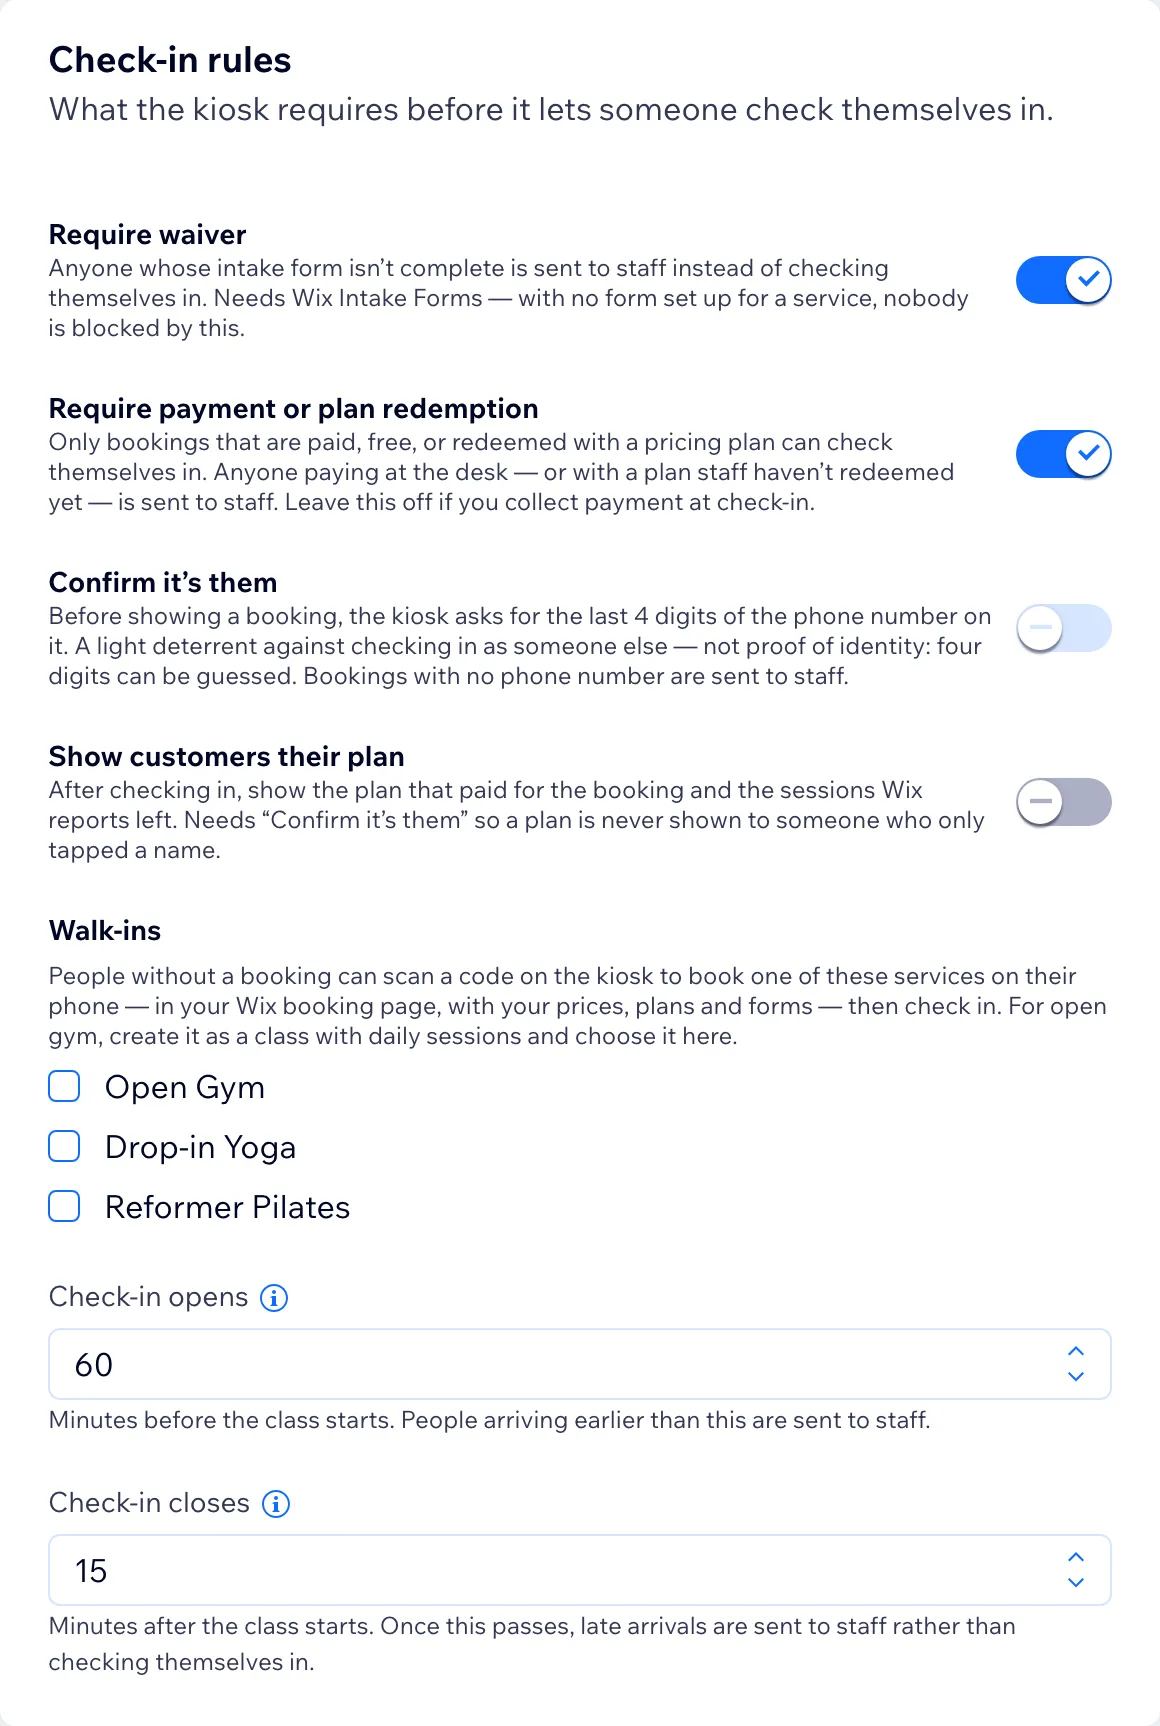
The Check-in rules panel.


Try it before the first class
- 1.Make a test booking for today, inside your check-in window, then type three letters of its name on the kiosk.
- 2.Tap Check in and confirm the kiosk says "You're checked in".
- 3.Open the booking in Wix Bookings and confirm its attendance now reads Checked-In.
- 4.Try an unpaid booking with Require payment on. The kiosk says "Please see staff" and the dashboard shows why.


When all five rows of the Setup card read Ready, the kiosk is live.

Troubleshooting
Why can't activation find my kiosk page?
The page's URL (slug) has to be exactly check-in. Wix names a page after its title, so "Check-In Kiosk" becomes check-in-kiosk. Fix the slug in the page's settings and publish again. The Setup card in the dashboard should then show "Kiosk page at /check-in" as Ready.
Why does the tablet say "This device is not set up yet"?
The tablet hasn't been activated, or someone pressed Revoke Device in the dashboard. On that tablet, open the Better Check-In dashboard, press Activate Kiosk, then tap Open kiosk on this device. A revoked tablet is activated again as a new device.
Why does the kiosk say "Self check-in is paused"?
The site has no active Premium subscription. Start the free trial or upgrade from the Subscription card in the dashboard. The tablet stays signed in and resumes on its own once Premium is active again.
A client signed the waiver but the kiosk keeps waiting. Why?
The form was probably signed with a different email from the one on the booking. Wix connects a form to a client by email, so a mismatch files it under another contact. After 10 minutes the kiosk asks the client to see staff. Have clients use the email they booked with.
Check-in fails on the tablet after I approved an update. Why?
A tablet that was left open keeps running the previous version of the kiosk until it reloads. Reload the kiosk page on each front-desk tablet, or close and reopen it. Nothing was recorded incorrectly, and the tablet stays activated.
Still stuck? The help guide covers every rule in detail, or email [email protected]. We aim to reply within 2 business days.